My name is Brandon Lee, and I work as a technician here in Orlando. Over the years, I have seen homeowners save money by catching small issues early. I have also watched DIY attempts backfire, costing way more in the end. The question is not whether you should inspect garage doors. The real question is knowing which tasks you can handle alone and which need a trained eye. Today, I am breaking down exactly what you can tackle yourself and when to call for backup.
Why Regular Inspections Matter for Orlando Homeowners
Central Florida throws a lot at your home. Humidity, heat, and storm season all take a toll on moving parts. I have responded to calls where a simple worn roller turned into a full track replacement. That happens when warning signs get ignored for too long.
When you inspect garage doors regularly, you catch rust before it eats through hinges. You notice frayed cables before they snap. And you spot misaligned sensors before they stop working during a thunderstorm. In Orlando, our humidity accelerates corrosion faster than folks expect. I tell homeowners to inspect garage doors every three to four months at minimum.
The opener works hard in our climate too. Heat degrades the motor’s internal components over time. Catching a sluggish response early can save you from a full unit replacement later. Learning to inspect garage doors properly is one of the best habits you can build as a homeowner.
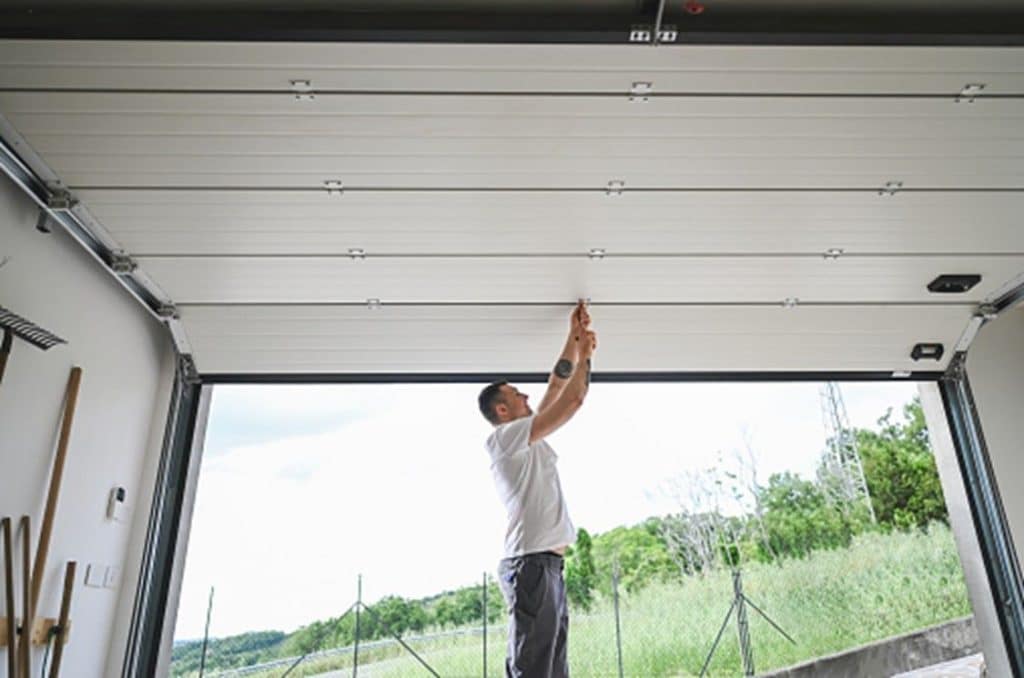
What a DIY Inspection Looks Like
A basic visual check is something anyone can do. Start by watching the system operate. Listen for grinding, scraping, or clicking sounds that were not there before. Uneven movement or hesitation tells you something is off mechanically.
Next, look at the hardware. Check each roller for cracks or chips. Examine the hinges for rust or looseness. Run your eyes along the cables for any visible fraying. I always tell folks to use a flashlight, the shadows from overhead lights hide a lot. When you inspect garage doors this way, you catch problems early.
Lubricate moving parts twice a year with a silicone-based spray. Avoid WD-40 here. It collects dust and gunk over time. A lithium-based white grease works better on springs and hinges. This is the kind of tip you will not find in a basic manual.
Simple Safety Tests You Can Run at Home

Federal law requires all openers manufactured after 1993 to have an auto-reverse feature. You can test this yourself in under a minute. Every time you inspect garage doors, include this safety check.
Place a 2×4 flat on the floor where the panel meets the ground. Close the unit using your remote. The system should reverse immediately upon contact with the wood. If it does not, your force settings need adjustment or you have a bigger problem.
Also test your photo-eye sensors. Wave your foot through the beam while the panel is closing. It should stop and reverse right away. If the light on your sensor is blinking or dim, clean the lens with a soft cloth. Dust and cobwebs block the beam more often than you would think.
- Check for grinding or scraping sounds during operation
- Look for rust on hinges, tracks, and springs
- Test auto-reverse with a 2×4 board
- Wave through the sensor beam to confirm it stops the cycle
- Lubricate rollers and hinges with silicone-based spray
When to Inspect Garage Doors with Professional Help
Some tasks require training, tools, and a healthy respect for tension. Torsion springs are at the top of that list. These coils hold extreme pressure. I have seen homeowners injure themselves badly by trying to adjust them without proper winding bars.
When you inspect garage doors and notice the panel feels heavy, that points to a spring problem. Your opener should not carry the full weight. The springs do that work. If you disconnect the opener and the panel slams down or shoots up, that balance is off. This is not a DIY fix.
Track alignment is another area where professionals add real value. A bent track causes binding, cable derailment, and premature wear on the opener. In Orlando, I often see tracks shift after hurricane season due to subtle structural movement. Straightening them requires precision tools and measurements. Knowing when to inspect garage doors yourself versus calling a pro makes all the difference.
Signs You Need a Pro in Orlando
Call a professional when you experience:
Visible cable damage or fraying. Cables hold massive tension. A snapped cable whips with serious force. Slow response from the opener after ruling out battery and sensor issues. The motor could be failing internally. Loud banging or popping sounds. That often signals a spring near the end of its cycle life. The panel looks crooked or hangs unevenly. That means hardware is failing or the tracks are bent.
I recently worked on a home in Windermere where the owner heard a pop and then the panel would not move. The torsion spring had snapped overnight. Because they called right away, we replaced both springs in about 90 minutes. Waiting would have damaged the opener trying to lift a heavy, unbalanced load.
Florida Safety Regulations Every Homeowner Should Know
Living in Florida means your system has to meet specific codes. Our climate and hurricane exposure create unique requirements. Before you inspect garage doors for compliance, here is what you need to know:
- Florida Building Code, Residential (2023) – Requires replacements to meet current wind design pressure standards and proper installation per manufacturer instructions. Consequences: failed inspections and voided insurance coverage.
- CPSC 16 CFR Part 1211 – Federal standard requiring auto-reverse mechanisms and external entrapment protection like photo-eye sensors on all openers. Consequences: legal liability and potential fines.
- UL 325 Standard – Mandates that all professionally installed residential openers include safety reversing systems since 1993. Consequences: non-compliant systems may not be covered by homeowner’s insurance.
Orlando falls within a high wind zone. If your system was installed before 2002, it likely does not meet current WindCode requirements. That matters for insurance claims after storms. Always verify compliance with Orange County code enforcement before major replacements.
DIY vs. Professional Inspection Costs
Handling basic maintenance yourself costs next to nothing. A can of silicone lubricant runs about eight dollars. You already own a flashlight. Most safety tests take five minutes and zero money. When you inspect garage doors on your own, the investment is mainly your time.
A professional visit typically costs between $75 and $150 for a full evaluation. That includes force calibration, spring assessment, and written findings. When you inspect garage doors yourself, you might miss cable wear inside the drum or hairline cracks on torsion springs. Those are trained-eye catches.
Spring replacements generally run between $200 and $400, depending on size and type. Waiting until a spring snaps often damages other components. I have quoted repairs that doubled because a failing spring took the opener rail with it. The math favors catching problems early. Taking time to inspect garage doors now prevents costly surprises later.
How to Inspect Garage Doors the Right Way - Final Thoughts
Both DIY checks and professional evaluations have their place. Handle the basics yourself, visual inspections, lubrication, and safety sensor tests. Leave springs, cables, and track alignment to trained technicians.
When you inspect garage doors on a regular schedule, you protect your family and your wallet. Small issues stay small. That grinding noise does not turn into a broken spring at midnight. The sluggish opener does not burn out next summer.
Here in Orlando, I recommend a professional evaluation once a year. Combine that with your own quarterly visual checks. That routine keeps everything running safely and quietly. If something feels off, trust your instincts and call someone. Your system gives warning signs. Make it a habit to inspect garage doors consistently, and you will catch those signs before they become real problems.
How often should I inspect garage doors in Florida?
I recommend a full professional evaluation once each year, paired with your own visual checks every three to four months. Florida’s humidity accelerates corrosion and wear faster than drier climates. Quarterly checks let you catch rust, frayed cables, and sensor issues before they become expensive problems. Storm season makes this even more important since high winds can shift tracks and stress hardware.
Can I replace my own torsion springs?
I strongly advise against it. Torsion springs hold extreme tension and require specialized winding bars for safe removal. Improvised tools slip, and injuries happen fast. Even experienced DIYers get hurt attempting this repair. The savings are not worth the risk. A professional can replace both springs in about an hour, ensuring proper tension and balance.
What causes a garage door to reverse before hitting the floor?
Usually, the force settings on your opener need adjustment. The system thinks it is hitting an obstruction. Sometimes the travel limit switch needs recalibration. Misaligned photo-eye sensors also cause this behavior. Start by cleaning the sensor lenses and checking their alignment. If the problem persists, your opener’s sensitivity settings likely need professional calibration.
How do I know if my system meets Florida building codes?
Check your installation date first. Systems installed before 2002 probably do not meet current wind design pressure standards. Look for a product approval sticker on the interior panels showing a Florida Product Approval number. If you cannot find one, contact Orange County code enforcement or a licensed contractor for verification before hurricane season.